Process
Custom Paint Process
We want you to know what is included in the Cutting Edge Illusions custom paint experience while maintaining our trade secrets. It goes far beyond just the paint. You will receive timely email responses and progress reports with many pictures. Equally important, you will receive our second to none talent and proprietary methods and techniques, which are performed only here. We invite you to peruse our complete paint process details below.
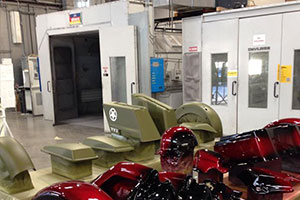
We have paint spray guns specially designed to spray each step: primer, sealer, solid base, sparkle base, flakes, pearls, kandys, blending paint, artwork, clear, and undercoating. Our guns are cleaned directly after use and maintained in working condition. We wear hooded spray suits, gloves, eye protection, ear protection, hoods, dust masks, and respirators when required. We have two coach sized booths, one smaller downdraft booth, an infared oven and prep and finish areas. We perform routine maintenance on all our equipment so that everything is running in tiptop condition. Our shop is well organized and cleaned regularly. Cutting Edge Illusions has a security camera and is in a gated industrial park. We are also fully insured. We do not cut any corners or steps of our process under any circumstance. We believe it’s worth the money to have your bike painted right the 1st time.
We take care of your entire custom painting process and give you the quality we would look for ourselves. Our show finish custom paint process includes the following:
1. LABOR & MATERIALS: We use the finest materials and custom paint products on the market, which are all included in your estimate. Our labor and every proprietary process that we've developed ensure that your job meets our standards and exceeds your expectations.
2. DESIGN PROCESS: We collaborate to come up with the ultimate paint theme for you with pictures, references, color samples, a design consultation, sketches and renderings, scans, emails, phone calls -- whatever it takes to get your project off the ground and running. The perfect paint theme can be elaborate to some and simple to others. During this phase we go over ideas, colors, layouts, logos, airbrushing, and other details to make this project unique and perfect for you. We will translate the ideas and images in your head and turn them into a reality on your motorcycle.
3. PREPARATION PROCESS: We always begin by inspecting each one of your parts for damage and notify you right away that we received your motorcycle parts safely. We photograph each part and start a gallery for you at this time. Any areas such as filler cap holes are masked up to eliminate over spray and maintain a clean crisp finished tape line. We use our large 14 ft. x 26 ft. cross flow booth for all of our prepping. This booth conceals the prepping dust while the 13000cfm booth fan blows the dust outside through ducting. We have twin air compressors which are designed for paint shop use and supply us with 150cfm air. Our compressed air runs through piping, filters, and dryers feeding us anywhere in the shop with high volume clean and dry air. Our Rock Solid™ prep work begins with stripping, sand and bead blasting, and machine sanding any existing paint off your sheet metal, skins, body work, parts, or helmets. We like to start with a clean slate so that we can fully warranty our work. If your parts have any damage we will find it and fix it. Even a little scratch on the back side of a brand new part will be treated and fixed so that the rust is locked out and the detail is clean. It’s very important to give enough attention to detail properly prep each square inch of every part to our superior Cutting Edge Illusions standards. We double and triple Quality Control our prep and body work process before it’s officially completed for priming.
4. ACID ETCH & PRIMER: First we prepare our down draft spray booth followed by setting up all your parts in the booth angled on racks and hung just right. This booth is the Cadillac of spray booths. It’s fully adjustable pressurized, it has bright accurate simulated sunlight, temperature control, bake cycles, humidity control, and is extremely clean for spraying. We blow the parts using high pressure, wipe them with 3 solvents 3 separate times, re-blow them, and tack using 2 different styles of tack rags. Next acid etching is mixed and sprayed as a rust preventative and metal adhesive. After proper flash and force dry time multiple coats of primer are sprayed which locks in all surface types and body work.
5. BAKING THE PRIMER: This is where we stand clearly apart from our competition. We have an infrared booth with 360 degrees of ultimate baking lights. An infrared booth is the very best possible way to adhere or connect paint to your motorcycle part surfaces. We control the density, time slots, and zones of our infrared booth while a venting system exhaust vapors. What is superior about this booth is that the infrared cures the paint starting from the inside of your part and making its way to the outside surface (most paint is cured only on the outside with heat or room temperatures). Infrared booths can be found at state-of-the art paint systems like car manufacturers. The difference our infrared booth will bring to you is a custom paint job which does not change over time, no die back in the base or clear coat creating a dull look, no separation, flaking, bubbling, etc. which makes all of the difference in the world in the finished product.
6. SANDING THE PRIMER: After your parts are fully cycled through our infrared booth and cured we prefer to let them sit until the next day before sanding. We then apply a guide coat and begin wet sanding with a series of sanding blocks until the surface is as smooth as silk. All the little crevices and hard to sand corners are then detailed by hand. Finally, each square inch is blown off and quality checked.
7. SEALER: Again we prepare the booth, set up all your parts, blow them off, wipe them with our solvent process, double tack them, and dial the spray booth temperatures so that each part surface is at correct spec for spraying sealer. After our sealer is mixed and sprayed we turn up the booth temperatures to 140 degrees while sustaining our super clean spray environment.
8. GROUND COAT BASE: After the sealer has flashed properly the temperature is adjusted and we spray multiple coats of our ground coat base directly over the sealer. Again, once this is completed we bake your parts at 140 degrees and above.
9. SANDING THE GROUND COAT BASE: After the bake cycle is completed we let your parts stand for a specific amount of time which is non-disclosed. We then sand the ground coat base very smooth for the custom base colors we will use.
10. BASE COAT: Again we prepare the booth, set up all your parts, blow them off, wipe them with our solvent process, double tack them, and dial the spray booth temperatures so that each part surface is at correct spec for spraying the base coat. We are now ready for your 1st base color (or only base color if you are going with a one color custom paint job). We use our paint computer programs, mixing banks, and scale to measure and make any automotive or custom paint color. All of this is done in a code standard enclosed mixing booth with proper temperature control and ventilation. Our mixing bank set up on a timer automatically mixes all the toners around the clock. We have many different methods for the order we spray your colors depending on your design complexity. We will post pictures of this and every step to your gallery so you can be a part of the process. At this point your base color has been properly sprayed, covered, and baked. It takes many coats to properly cover base coat.
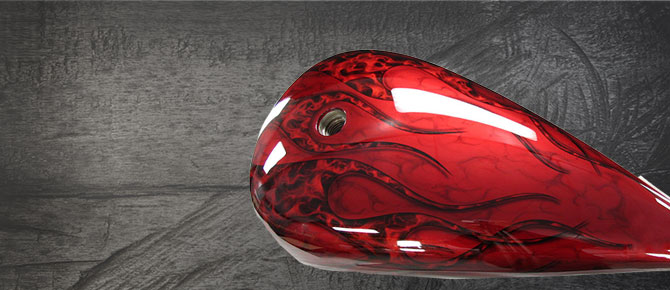
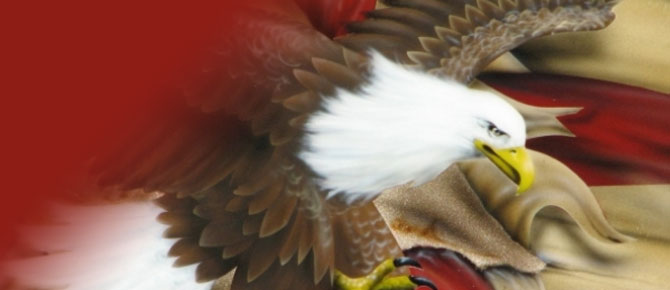
11. DESIGN & ARTWORK: The next step is to begin layout, airbrushing, kandy spraying, or blends. It all depends on your project details . . . If your design requires kandy, we spray at least 8 coats of super deep jolly rancher type kandy over a variety of sparkle and secret base coats. If we are airbrushing, we have 8 airbrushes connected to our mixing banks and scale systems. We have different style airbrushes set up which are specifically designed for one thing and each has a different size needle. If we are doing color fades or blends this is also possible through our proprietary color blending methods which are as smooth and gradual as a sunset (as you may have seen Jeff Gordon’s 45 foot coach blend on Discovery Channel or NASCAR race day on TV that we painted a few years back). We do our layouts by hand with fine line. Most of our layouts are symmetrical side to side as a mirrored image, however some of our designs require asymmetrical layouts. It’s important to make a symmetrical layout correct because a little error stands out too much. We use our sketches, computer concepts, and pictures as reference. We computer design and use our plotter for detailed logos, murals, etc. Using advanced technology and intelligence on our side such as our computers, computer programs, drawing computer tablet (for being able to actually sketch with a cyber pen as its being transferred to our computer screen), and of course our cutting plotter for the most accurate stencils for details and realism possible. We also use real 3D models and objects depending on what we are implementing as reference. We will post many pictures of this process to you gallery and seek your feedback as we go until we get to the clear coat process.
12. FIRST CLEAR: Again we prepare the booth, set up all your parts, blow them off, wipe them with our solvent process, double tack them, and dial the spray booth temperatures so that each part surface is at correct spec for spraying clear coat. We now apply our proprietary 1st clear coat process. We now have created our 1st step to depth and a protected barrier of at least 4 coats of clear coat over all of your parts. After they are temperature force baked we move them into the infrared booth for a cycle of drying from the inside out.
13. SANDING THE 1ST CLEAR COAT: After your parts are fully cycled through our infrared booth and cured we prefer to let them sit until the next day before sanding. We then begin wet sanding with a series of sanding blocks until the paint lines, if any, are flattened and the surface is as smooth as glass. It’s important to us that all the paint edges from one color to another are nonexistent. There will be no rough edge between colors which you will find in paint jobs from many other shops. The combination between our clear process and sanding techniques will bring you the highest results. All the little crevices and hard to sand corners are then detailed by hand. Each square inch is blown off and quality checked.
14. CLEAR ADHESIVE PROMOTER: Again we prepare the booth, set up all your parts, blow them off, wipe them with our solvent process, double tack them, and dial the spray booth temperatures so that each part surface is at correct spec for spraying adhesive promoter. We apply our adhesive promoter process to your parts at this point.
15. FINAL DESIGN & DETAIL: Next in the process is the secondary layer of layouts, additional artwork, airbrushing, and most importantly final detailing and shadowing. All of our work is finished off with shadows, which can be subtle, concentrated, or anywhere between depending on your requests. We now have a super flat surface and everything is detailed to perfection. Again, pictures will be posted for your approval.
16. ADDITIONAL CLEAR COAT BARRIER: In some cases we repeat the 1st clear, sanding of the 1st clear, adhesive promoter and the final design processes. This is done for complicated layouts and murals and this is always included in your price estimate.
17. FINAL CLEAR COAT: Again we prepare the booth, set up all your parts, blow them off, wipe them with our solvent process, double tack them, and dial the spray booth temperatures so that each part surface is at correct spec for spraying the ultimate final clear coat. We then apply at least 6 more coats of final clear over the finished product. We use a final clear coat specially formulated with more silicone pack (extra gloss) and durability than anything out there. We apply our proprietary method once again to our final clear coat, which sets us apart from other motorcycle painters. Now your parts are ready to be sprayed in a temperature regulated down-draft booth by our experienced final clear coat artist Eric, who has many years of experience spraying clear coat consistently.
18. FINAL BAKE: The parts are now flashed, force dried, and moved to the infrared booth for a specific amount of time. Your paint has officially gone through our Cutting Edge Illusions process of quality, detail, design and artwork created specifically to your liking. Our second-to-none durability and long lasting custom paint includes you in the Cutting Edge Illusions exclusive.
19. BUFFING/POLISHING PROCESS: Once your parts are through our final bake process and cured without bake for the proper amount of time we move them into our buffing station to begin wet sanding the surface. We use 5 different grits of sand paper on the entire surface; even the areas hard to see once your parts are on the bike. We then machine buff using 3 different types of pads and glazed to a beautiful deep gloss shine that is customary here at Cutting Edge Illusions.
20. UNDERCOATING: In order to keep the underside of your fender as clean and detailed as your top exposed side, we perform undercoating after the paint and buffing process. This ensures that the undercoat is kept clean from paint over-spray and buffing compound. We begin the undercoating process by painstakingly masking off all of your fender's painted area and holes. We then prepare the surface by sanding, spray several layers of undercoat, unmask the top surface, and then final glaze.
21. FINAL PICTURES: Your parts are now ready for their final photo shoot. We take many high quality final pictures of every job we do and post them to your private gallery.
Our attention to detail, planning and service really come through in all of our work. We have the experience and talent to get your job done, as well as the integrity and passion to follow it through to your ultimate satisfaction. We are there every step of the way and we do everything we can to support you, our valued customer. We look forward to the opportunity to paint your motorcycle and prove to you that we are the real thing.


